


Installation Guide: Fixing to the Wall
Installation Instructions:
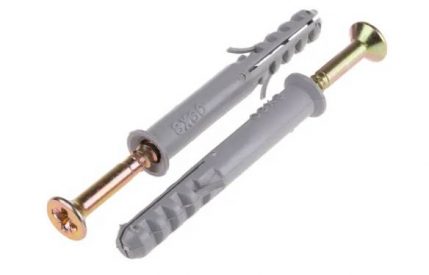
Fixing to the wall
You will need a masonry drill (6 mm) and screwdriver. And ideally, a spirit-level to ensure that the 4 holes are level. Wall plugs and screws are included in the pack, along with a general guide to installation. You may find it better to use a slightly bigger screw than provided in the pack if your wall fitting isn’t tight.
A template is also provided to help give an indication as to how the infrared panel will look on the surface, and to show the drilling spots for the screws.
Wires can be either hidden or exposed.
From each panel, there is an electrical lead and standard UK plug attached. This goes into an ordinary wall socket, or if one is not nearby, then use a standard extension lead to reach it with the appropriate fuse rating.
The cables can be hidden. One method is to buy sticky backed plastic electrical conduit and hide the wire in that. It can run down the wall and along the top of the skirting board to the nearest electrical socket.
Of course, for a complete job, the wires will need to be buried into the wall. Use a level to mark to horizontal pencil lines from under where the panel will be on the wall down to the skirting board and chip out the plaster to a depth of about 1 inch. There are specialist routing tools, some of which go on the end of electric drills, which will automate this process. Clearly, this work can be a bit messy, but it’s perfectly possible to do for most handy persons and can be tied into a refurbishment or renovation.
In the event the purchaser chooses to fully install the heaters, but appoints an independent electrician/installer, this entirely at your own risk and liability so please consult and read fully our terms and conditions including our warranty policy.
Panels can be wired into an electrical circuit within the property, whether this is the existing circuit or requires a new circuit is to be determined and is the responsibility of a fully qualified electrician installing the system.
Removing the plug counts as altering the product under normal circumstances. This in turn will void the warranty however if the installer is a fully qualified electrician, upon completing the installation the purchaser must supply Warm4less with the relevant documentation certifying the installation has been correctly carried out, either by email or by post to our trading address. This will keep the warranty intact under normal circumstances after having approved the documentation provided.
When a plug is removed and the panel is being wired in, the electrician will draw power from the nearest and most appropriate power source. Then go to a switched fused spur, then to the controller in question (or receiver) and then to a fused power outlet which feeds each panel.
In the even multiple panels are being installed to one controller or one receiver, each panel requires its own fused power outlet.
It’s important that the correct, lowest rated fuse is used with each panel for the right protection.
Alternatively, panels can be installed in a chain using, for example using a clip connector i.e. WAGO providing the connector is the correct rating for the panel/s in question.
If you’re unsure as to what surface the panel is being installed on, you must consult us prior to fixing the panel to ensure a safe fixing.
If there is anything you or your electrician is unsure, please consult the relevant professional body for advice and expertise when wiring in the heaters.
